Cleaning Techniques for Laptop Fans: A DIY Repair Tutorial

Laptop running hot, loud, or randomly shutting down? Dust-clogged fans are a common cause. Learning safe cleaning techniques for laptop fans is one of the most useful DIY tech repair skills you can pick up. This tutorial walks you through the process step by step, from quick surface cleaning to deeper disassembly, using simple tools you may already own.
Why Regular Laptop Fan Cleaning Matters
Dust and lint build up slowly inside a laptop. Over time, this buildup blocks vents, weighs down fan blades, and traps heat around the processor and graphics chip. Cleaning techniques for laptop fans restore airflow so the system can cool itself properly again.
A clean fan spins more freely, so the laptop stays quieter and cooler during normal use. This reduces stress on internal parts and can prevent sudden shutdowns or throttling during heavy tasks like gaming, video calls, or large downloads.
Think of fan cleaning as basic home maintenance for your laptop. Just as you would clean a clogged vacuum filter or a dusty air vent, you should refresh the cooling system before problems grow serious.
Tools and Safety Prep Before You Clean a Laptop Fan
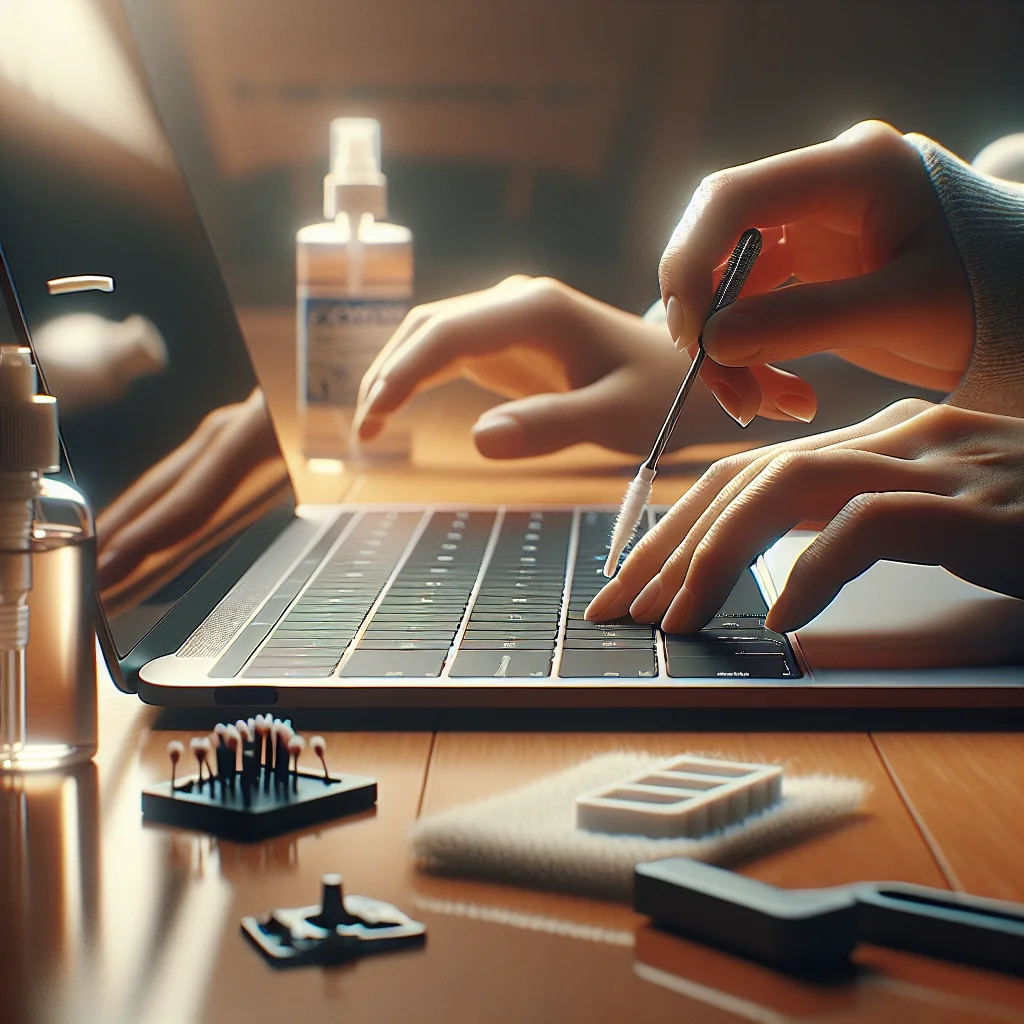
Good preparation makes cleaning techniques for laptop fans safer and more effective. Gather a few basic tools first, then set up your workspace so you do not damage the laptop or hurt yourself during the process.
Essential Tools and Materials
You do not need advanced repair gear, but using the right simple tools helps you clean precisely and avoid breaking parts. The short guide below explains what each common tool does and why it helps.
Common tools for cleaning a laptop fan
| Tool / Material | Purpose |
|---|---|
| Small Phillips screwdriver | Opens the laptop case or bottom panel to reach the fan |
| Compressed air can | Blows dust out of the fan blades and vents without contact |
| Soft brush | Loosens stubborn dust on the fan and heat sink |
| Microfiber cloth | Wipes dust from surfaces without scratching plastic or metal |
| Plastic spudger or guitar pick | Helps pry open clips without damaging the laptop shell |
| Small container for screws | Keeps screws organized so you do not lose or mix them |
Have all tools within reach before you start, and check your laptop manual or maker’s support page to confirm which screwdrivers and opening points you need for your specific model.
Safety Steps Before You Open the Laptop
Basic safety prep reduces the risk of short circuits, static damage, or broken parts. Follow these steps slowly instead of rushing into the cleaning process so you can focus on the fan once the laptop is safe.
- Shut down the laptop fully, then unplug the power adapter.
- Disconnect all devices, including USB drives, monitors, and chargers.
- If the battery is removable, take it out before you start.
- Press and hold the power button for 10–15 seconds to discharge leftover power.
- Work on a clean, dry, non-metal surface with good light.
- Ground yourself by touching a metal object or use an anti-static strap.
- Read the service or user manual for any warnings about opening the case.
- Check that your compressed air can is upright and still, to avoid moisture spray.
Once you have the right tools and have followed these safety steps, you can open the laptop more confidently and clean the fan without causing preventable damage.
Step-by-Step: Basic External Cleaning of Laptop Vents
Start with the least invasive method. Sometimes a simple external clean can restore decent airflow without opening the case. This is ideal if your laptop is still under warranty or has a sealed design.
Quick Safety Checks Before You Start
Take a moment to set up a safe workspace. This reduces the risk of damage to the laptop or injury to you while you carry out the external cleaning steps.
- Work on a stable, clean surface away from liquids.
- Unplug the charger and remove any connected devices.
- Avoid working on carpet to reduce static build-up.
Once your space is ready and the laptop is unplugged, you can move on to the actual cleaning steps and focus on the vents and fan openings.
External Cleaning Steps for Laptop Vents
Follow these steps in order. Move slowly and avoid using force on any part of the laptop casing or vents, especially around delicate grills and fan blades.
- Power down and cool off. Let the laptop sit for at least 10–15 minutes so internal parts are not hot.
- Locate the vents. Look along the sides, back edge, and underside for intake and exhaust grills.
- Hold the fan still. If you can see the fan through the vents, gently insert a toothpick or cotton swab to stop the blades spinning. Do not force it.
- Use compressed air in short bursts. Blow air into each vent from different angles, holding the can upright. Use quick bursts, not a long stream, to avoid moisture build-up.
- Brush away loosened dust. Use a soft brush around the vents to remove dust that settles on the surface.
- Repeat for all vents. Work around the entire laptop, then give it a light wipe with a dry microfiber cloth.
This basic cleaning is quick and similar in difficulty level to clearing dust from a phone charging port or cleaning a keyboard. If the laptop still runs hot or loud, move on to deeper cleaning inside the case.
Deeper Cleaning: Opening the Laptop for Direct Fan Access
For a thorough clean, you need direct access to the fan and heatsink. This step is more advanced, but still doable if you stay patient and organized during every part of the disassembly and reassembly process.
Before you start, take clear photos of each stage with your phone. This habit helps in many DIY jobs because you can see exactly how things were before and match cable routes, screw positions, and cover placement.
Removing the Bottom Cover Safely
Most modern laptops open from the bottom. Some have a single large panel; others have smaller access doors, but the general approach is similar across many brands and models.
- Remove all visible screws. Lay the laptop upside down on a soft cloth and remove the screws along the edges and in the center. Keep them in order, as lengths can differ.
- Check for hidden screws. Look under rubber feet or stickers and around the battery area. Some models hide screws here.
- Release plastic clips. Slide a plastic spudger or guitar pick into the gap between the cover and the chassis. Gently work around the edges to pop clips free. Do not twist metal tools; they can bend the casing.
- Lift the cover carefully. Once the clips release, lift the cover slowly, watching for any cables attached to it, such as speaker wires in some designs.
If a section feels stuck, do not force it. Recheck for missed screws. This same patience applies to other repairs where hidden screws or clips are common and easy to overlook.
Cleaning the Fan and Heatsink Fins
With the cover removed, you should see the fan, heatsink, and cooling fins. Now you can remove the dust that external cleaning could not reach and restore proper airflow through the cooling path.
- Ground yourself. Touch a metal part of the chassis or use an anti-static strap to discharge static.
- Hold the fan blades. Use a cotton swab or your finger to gently keep the fan from spinning while you clean.
- Blow dust out of the fan and fins. Use compressed air in short bursts from both sides of the fan and along the heatsink fins. Aim to push dust out of the laptop, not deeper inside.
- Brush stubborn debris. Use a soft brush on the fan blades and around the edges. Be gentle; do not bend the blades.
- Clean the vents from the inside. Blow air through the vent grills from the inside out to clear dust mats.
- Optional: Wipe non-electrical surfaces. Lightly dampen a cotton swab with isopropyl alcohol and wipe plastic fan housings or the inside of the bottom cover. Avoid soaking anything.
Once you see the fins and fan blades clearly with no dust clumps, you have done the core of the job. This level of disassembly is similar to mid-level laptop repair, but usually easier than full screen or motherboard replacements.
Reassembling the Laptop and Testing the Fan
Reassembly is your chance to double-check everything. Rushing here can lead to loose covers, missing screws, or pinched cables that cause new problems after a successful cleaning job.
Step-by-Step Reassembly Checklist
Work slowly and follow each step in order so the laptop goes back together cleanly and safely. A simple checklist keeps you from overlooking small but important details.
- Inspect cables and connectors. Make sure no cables are loose or trapped under the fan or heatsink.
- Place the bottom cover back on. Align it carefully and press along the edges to snap clips back into place.
- Reinstall screws in the right spots. Use your photos or notes to match screw lengths and positions.
- Reconnect the battery. If you removed an internal battery connector, plug it back in firmly.
- Power on the laptop. Start the laptop and listen. The fan should sound smoother and less strained.
- Check temperatures under light load. Use the laptop for web browsing or light work and notice if the fan stays quieter longer.
If the laptop does not power on, re-open it and check battery and cable connections. This same careful approach helps in other small repairs: if something feels off, back up one step and inspect before using more force.
Quick Fan Test Reference
Use this simple comparison to judge the fan’s behavior after cleaning and decide whether further work is needed or the laptop is ready for normal use again.
| What You Notice | What It Likely Means | What to Do Next |
|---|---|---|
| Fan is quieter and airflow feels steady | Cleaning worked and airflow improved | Use the laptop normally and monitor temperatures |
| Fan still very loud at light load | Dust remains or thermal paste may be weak | Re-check fan area and consider deeper maintenance |
| Fan does not spin at all | Fan cable may be loose or fan is faulty | Open the laptop again and confirm the fan connector |
Spend a few extra minutes on these checks so you catch any problems early, before they turn into fan failure, overheating, or data loss later on.
Common Mistakes to Avoid While Cleaning Laptop Fans
Many laptop cooling systems get damaged not by dust, but by rushed cleaning. Avoid these frequent errors to keep your repair safe and protect delicate components from stress or shock.
High-Risk Cleaning Habits
Some habits seem harmless but can quietly damage the fan or motherboard. Watch for these common mistakes and replace them with safer methods whenever you clean a laptop fan.
- Spinning the fan with compressed air. Over-spinning can damage bearings. Always hold the blades still.
- Using a vacuum directly on components. Vacuums can create static and pull small parts loose.
- Using liquid cleaners inside. Water-based sprays or glass cleaner can short components.
- Forcing covers or screws. If something does not fit, check alignment or screw length.
- Ignoring static electricity. Always ground yourself before touching internal parts.
These caution points mirror other DIY jobs. A single rushed step can cause more trouble than the original issue, whether cleaning fans or replacing parts. Slow, careful work beats speed every time.
How Often to Clean Laptop Fans and Spot Overdue Signs
The right cleaning schedule depends on your environment. Dusty rooms, pet hair, and smoking all speed up buildup. Many laptop owners find that once or twice a year is reasonable, but your conditions may call for more frequent care.
Recommended Cleaning Frequency by Environment
Use this simple guide to decide how often to clean your laptop fans based on your typical surroundings. Adjust the interval if you notice heat or noise problems sooner than expected.
Suggested laptop fan cleaning intervals
| Environment | Typical Use | Suggested Cleaning Interval |
|---|---|---|
| Clean, air-conditioned office or home | Desk use, no pets, little dust | Every 12–18 months |
| Average home environment | Some dust, occasional couch or bed use | Every 9–12 months |
| Dusty or pet-heavy home | Pets, fabric surfaces, open windows | Every 6–9 months |
| Very dusty or smoky areas | Workshops, smoking indoors, construction dust | Every 3–6 months |
Treat these ranges as a starting point. If you notice heat, fan noise, or performance issues sooner, clean the fans earlier rather than waiting for the full interval to pass.
Warning Signs Your Laptop Fans Need Cleaning Now
Do not rely on the calendar alone. These warning signs mean your fans are probably overdue for a cleaning and the laptop could be running hotter than it should.
- Fan runs at high speed even during light tasks.
- Laptop base feels hot to the touch often.
- Random shutdowns or sudden slowdowns under load.
- Visible dust clumps in vents or on the fan.
Combine fan cleaning with other maintenance tasks to save time. For example, you might clean the laptop fan, straighten cables, and dust nearby shelves in the same session so your workspace and devices stay in better shape.
How Laptop Fan Cleaning Skills Help Other DIY Repairs
Once you are comfortable opening a laptop and cleaning the fan, you are ready for other simple tech repairs. Many skills carry over between tasks and grow your confidence with small electronics projects.
Easy Projects That Use the Same Repair Skills
Several beginner projects build on the same careful handling, tool use, and patience you use for cleaning techniques for laptop fans. These repairs use similar tools and safety habits.
- Fixing sticky keyboard keys by removing caps and cleaning underneath.
- Cleaning phone charging ports using safe, dry tools.
- Learning basic laptop upgrades like RAM or SSD installation.
- Practicing careful disassembly for game console or tablet cleaning.
Each of these repairs reinforces steady hands, good lighting, and organized parts. As you repeat these habits, laptop fan cleaning becomes a quick, low-stress task instead of a rare, risky job.
Skill Overlap With Other DIY Fixes
The comparison below shows how core skills from fan cleaning match up with other simple repairs and why those skills are worth practicing.
| Core Skill | Used in Fan Cleaning | Used in Other Repairs |
|---|---|---|
| Gentle disassembly | Opening the laptop case without cracking clips | Removing phone backs, keyboard keycaps, or trim panels |
| Dust and debris control | Blowing out dust from heatsinks and fans | Cleaning ports, vents, and tight spaces in phones and consoles |
| Part organization | Tracking screws from different sections | Keeping screws and brackets sorted during screen or keyboard swaps |
| Static safety | Avoiding shocks to motherboard and fan headers | Protecting RAM, SSDs, and other sensitive components |
| Patience and focus | Working slowly around fragile fan blades | Handling thin display cables and tiny connectors |
Even non-tech projects like mending clothes or small home fixes build the same patience and attention to detail. As you gain experience across different tasks, cleaning techniques for laptop fans will feel like one more easy, routine job in your DIY toolkit.
Key Benefits of Regular Fan Cleaning
Regular fan cleaning offers clear gains for performance, comfort, and long-term reliability. These benefits add up over time, especially on older or heavily used laptops that gather dust quickly.
Fan Cleaning Impact at a Glance
The simple overview below shows how cleaning techniques for laptop fans affect short-term performance and long-term care so you can see why the effort is worthwhile.
| Cleaning Focus | Short-Term Effect | Long-Term Benefit |
|---|---|---|
| Removing dust from fan blades | Quieter operation and smoother airflow | Less wear on the fan motor |
| Clearing vents and heat sinks | Lower surface and internal temperatures | Reduced risk of thermal throttling and shutdowns |
| Regular light cleaning schedule | More stable performance day to day | Longer laptop lifespan and easier future repairs |
Seen this way, fan cleaning is a quick DIY task that supports smoother use now and helps avoid costly repairs later. With a few basic tools and a careful approach, you can keep your laptop cooler, quieter, and more reliable for years.