iPhone Screen Replacement Guide: DIY Tutorial for Confident Repairs
This iPhone screen replacement guide walks you through the process step by step, with a focus on real DIY repair skills. You will learn how to replace screens on several iPhone models and handle a few related maintenance tasks that often appear during the same repair session. Treat this as a focused tutorial for common iPhone screen fixes, plus a short toolkit for safe, smart DIY work.
Core iPhone Screen Replacement Guide: Shared Basics
Most modern iPhones follow a similar pattern for screen replacement, even though screw sizes and connector layouts change by model. Once you understand the shared basics, you can apply the same method to devices like the iPhone 13, iPhone 14 Pro Max, and iPhone 15 Pro Max. This section explains the core flow and the main parts you will handle.
The basic process is simple in concept: remove the bottom screws, soften and lift the screen, disconnect the battery, unplug display and sensor cables, move needed parts to the new screen, then reconnect and close the phone. The most important safety rule is to disconnect the battery before unplugging any display connectors, which helps prevent short circuits.
Work on a clean, well-lit table and keep small screws in a tray or on a magnetic mat. Take photos as you go so you can retrace your steps later. A calm, organized approach does more for a successful screen replacement than any fancy tool.
Before You Start Any DIY Repair: Tools, Safety, and Mindset
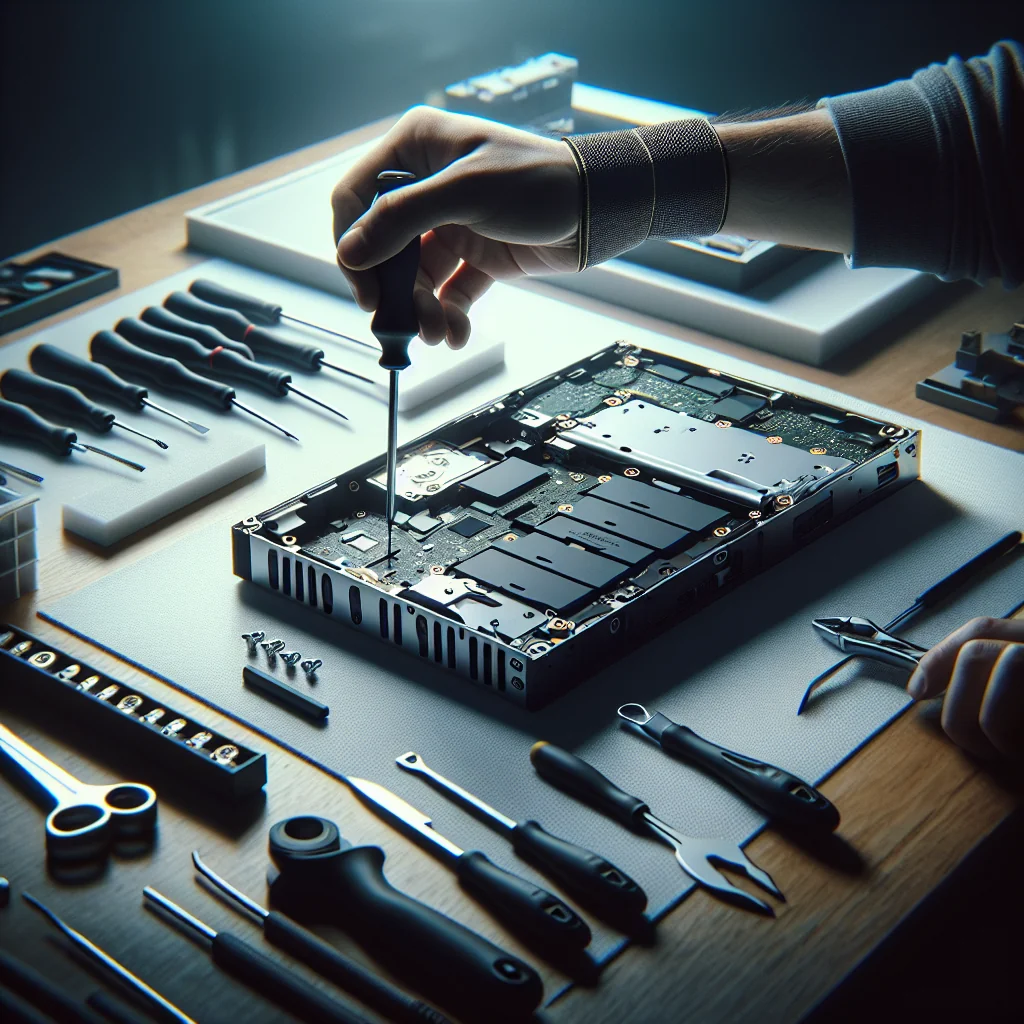
Good repairs start with the right tools and a steady mindset. Rushing or forcing parts usually causes more damage than the original problem. This section covers the tools you will reuse across iPhone screen repairs and other small tech fixes, plus a quick checklist to stay safe and organized.
Essential DIY Repair Tools and Safety Basics
For most phone and small electronics repairs, a basic precision kit is enough. You will reuse many of the same tools across jobs, from iPhone screen replacement to cleaning a laptop fan or fixing a sticky keyboard key. Having them ready before you open a device reduces stress and mistakes.
Common DIY Repair Tools and Uses
| Tool | Main Use |
|---|---|
| Precision screwdriver set | Removing tiny device screws without stripping them |
| Plastic spudger or pry tool | Separating screens and cases without scratching |
| Tweezers | Handling small screws, cables, and connectors |
| Microfiber cloth | Cleaning screens and parts without leaving lint |
| Isopropyl alcohol | Removing adhesive and cleaning contact points |
These tools cover most basic repairs. As you gain experience, you can add extras like a heat pad or magnetic mat, but this starter set is enough for your first iPhone screen replacement project.
Pre-Repair Checklist for Safer DIY Fixes
Before you begin any repair, run through this short checklist so you stay organized and avoid common errors. Treat it as your routine for every job, not just screen work.
- Power off the device fully and disconnect any cables or accessories.
- Gather tools and parts: screwdrivers, spudger, tweezers, cloth, alcohol, and new screen.
- Set up a clean, flat workspace with good light and a small container for screws.
- Take photos after each major step so you can reverse the process later.
- Work slowly and stop if something feels stuck or forced; check for hidden screws.
Keeping this checklist in mind for each project builds good habits. Over time, you will spend less energy on basic organization and more on careful, precise repair work.
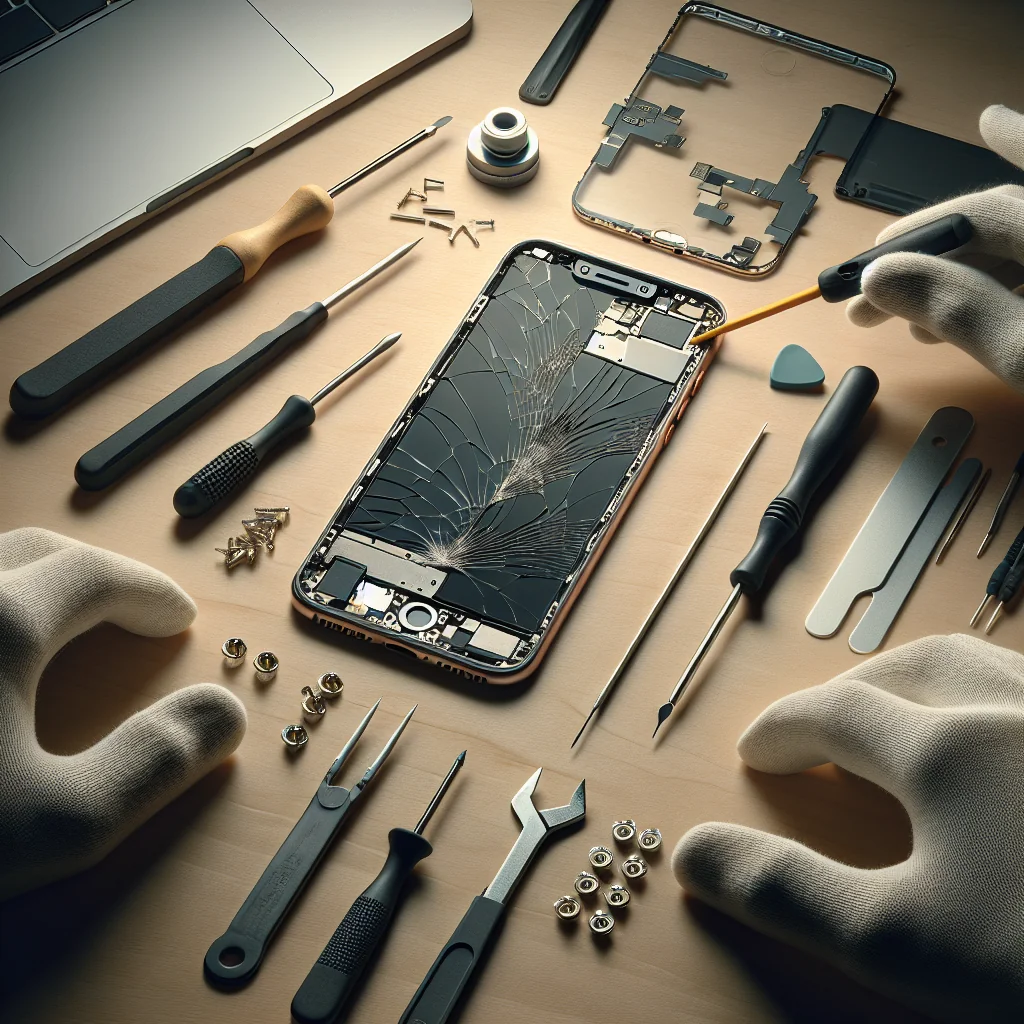
Key Parts You Handle During iPhone Screen Replacement
Understanding the main parts you will touch helps you stay calm during the repair. You will see more than just a screen and a battery once the phone is open, but only a few pieces matter for a standard screen swap. The list below covers the parts you will usually interact with.
- Bottom pentalobe screws by the charging port that hold the screen in place.
- Adhesive seal around the screen edges that keeps out dust and moisture.
- Battery connector that must be unplugged before display cables.
- Display and sensor flex cables that carry touch, image, and Face ID data.
- Earpiece speaker and front sensor assembly that often move to the new screen.
Knowing these parts in advance reduces surprises once the phone is open. You can then focus on handling each piece gently rather than trying to identify everything on the fly.
iPhone 14 Pro Max Screen Replacement: Step-by-Step
The iPhone 14 Pro Max is sealed with strong adhesive and includes important Face ID hardware near the top of the screen. Work carefully so you do not damage the front sensor area. Gentle heat around the edges helps soften the adhesive before you lift the screen.
Start by removing the two pentalobe screws by the charging port. Use a suction cup near the bottom edge and a thin plastic pick to open a small gap. Slide the pick along the edges to loosen the adhesive while lifting the display slightly, opening the phone from the left side like a book.
Inside, remove the metal shield that covers the battery and display connectors. Disconnect the battery first. Then unplug the display and sensor cables. Move any speaker or sensor parts from the old screen to the new one if your replacement does not include them. Reconnect the cables, then the battery, set the screen in place, test touch and Face ID, and only then press the screen down and reinstall the screws.
iPhone 15 Pro Max Screen Replacement: What Changes
For iPhone 15 Pro Max screen replacement, the process is similar but the internal layout and screw locations differ slightly. The same rules apply: heat the screen edges, remove the bottom screws, and open the phone gently from the side rather than pulling straight up.
The main difference is that newer models may have tighter adhesive and more delicate cable routing. Avoid bending the display cables sharply while the screen is open. When you move over parts, make sure the earpiece speaker and sensor assemblies sit flat and aligned, or Face ID and audio may fail after reassembly.
After closing the phone, test display brightness, touch, and the front camera. If something fails, reopen the phone and check each connector. A loose connector is a far more common issue than a bad new screen, especially on a recent device.
iPhone 13 Screen Replacement: Practical Walkthrough
iPhone 13 screen replacement follows the same pattern but is slightly more forgiving than the Pro Max flagships. This makes it a good project if you already have some repair experience but want a less intense challenge than a 14 Pro Max or 15 Pro Max.
Start by powering off the phone, removing the two bottom screws, and heating the edges. Use a suction cup and pick to lift the screen carefully from the left side. Inside, remove the connector shield screws and lift the shield. Disconnect the battery, then unplug the display and front sensor connectors.
Transfer the earpiece speaker and sensor assembly to the new screen if needed. This part is delicate, so work slowly and do not pry under the flex cables. Reconnect the display and sensor cables, then the battery, and test the screen. If touch is unresponsive in certain areas, reopen the phone and reseat the connectors before assuming the new part is bad.
iPhone XR Screen Replacement: Older Design Tips
iPhone XR screen replacement is a friendly first project if you are new to phone repair. The design is simpler than the latest Pro models, but the basic pattern is the same. You still need to watch for the Face ID sensor assembly at the top of the screen so you do not damage it.
After removing the bottom screws and lifting the screen, the phone opens from the left. Remove the connector shields, disconnect the battery, then unplug the display connectors. Move the earpiece and sensor assembly carefully to the new screen, then reassemble and test for touch, brightness, and Face ID.
Because the XR is older, the adhesive may be weaker or uneven. Replace the adhesive seal if you want better dust and splash resistance, but remember that DIY repairs usually reduce the original resistance rating compared with a factory-sealed phone.
How to Fix Phone Screen with Unresponsive Touch
If the phone screen does not respond to touch, you do not always need a full replacement right away. Start with simple checks like cleaning the screen and removing thick screen protectors or gloves that may block touch. Small bits of grit or a cracked protector can confuse the digitizer.
Restart the phone and check for software updates. If the problem stays in the same area of the screen and persists after a restart, the digitizer is likely damaged. In that case, a screen replacement, like the iPhone 13 or iPhone 14 Pro Max screen replacement steps above, is the real fix.
If touch fails after a fresh screen install, open the phone again and reseat the display connectors. Inspect the flex cables for tears or sharp bends. A damaged cable or loose connector is a common cause of dead touch zones and strange screen behavior after a repair.
How to Clean an iPhone Charging Port Safely
A dirty charging port can mimic charging failures or loose cable issues and often appears alongside screen damage from drops. Do not use metal tools inside the port, as they can scratch contacts or cause short circuits. Always power off the phone first for safety.
Use a wooden or plastic toothpick to gently scrape out lint and dust from the port. Work slowly and keep the tool flat against the bottom of the port, not the pins. You can also use short bursts of compressed air, held upright and at a distance, to loosen debris.
After cleaning, plug in a known good cable and check for a firm fit. If the cable still feels loose or charging drops in and out, the port may be damaged and need professional repair, especially if the phone has also taken a hard hit that cracked the screen.
Laptop Repair Mindset: When to DIY and When to Stop
Many people who attempt an iPhone screen replacement also want to fix laptops and other electronics. Some laptop repair tasks, like cleaning a fan or replacing RAM, are great for DIY. Others, such as liquid damage or motherboard faults, are harder and risky without advanced tools.
Always check if the laptop still has a warranty before opening it. If a repair requires advanced soldering or special parts you cannot source reliably, consider a professional. The goal is to fix the device and keep it reliable, not just to open it for curiosity.
Use the same careful method you use for an iPhone screen replacement: photos, labeled screws, and patience. The process matters as much as the tools, and knowing when to stop is part of being a skilled DIY repairer.
Bringing It All Together: Building Your DIY Screen Repair Skill Set
From iPhone 14 Pro Max screen replacement to simpler iPhone XR repairs, the same habits make DIY work successful: patience, the right tools, and a clear plan. Each project in this guide builds your confidence for the next one and helps you understand how modern phones are put together.
Start with safer tasks like cleaning an iPhone charging port or practicing screw handling on an old device. Then work up to screen replacements on older models before tackling your daily driver. As you gain experience, you will recognize patterns, spot fragile parts faster, and solve problems with less stress.
Treat every repair as practice, document what you do, and learn from each result. Over time you will build a reliable, practical skill set that saves money, keeps devices out of the trash, and makes you more confident handling your own tech.