How to Resolve Printer Paper Jams: A DIY Tech Repair Tutorial
Printer jams are one of the most annoying home and office problems, but most can be fixed in a few careful steps. If you want to know how to resolve printer paper jams without damaging your machine, this tutorial walks you through the process in a clear, practical way.
This guide focuses on home and small office printers, including inkjet and laser models. You will learn how to clear stuck paper, check for hidden scraps, and prevent future jams with simple habits you can repeat every day.
Key Jam Types and Quick Fix Difficulty
Before diving into the detailed steps, it helps to know what kind of jam you are dealing with. Different jam locations usually point to different causes and repair difficulty.
The table below gives a quick overview of common jam types, where they appear, and how hard they usually are to fix on your own.
Common printer jam types, causes, and DIY difficulty
| Jam Type / Location | Typical Cause | DIY Difficulty | Best First Action |
|---|---|---|---|
| Input tray jam | Overfilled tray or misaligned guides | Easy | Remove stack, reset guides, reload paper |
| Middle path jam | Curled paper or worn rollers | Moderate | Open access panels, pull paper in feed direction |
| Rear or duplex jam | Two‑sided printing or thick media | Moderate | Open rear door or duplex unit, clear folded sheets |
| Output area jam | Stacking too many pages at once | Easy | Remove printed stack, reprint smaller batches |
| Frequent recurring jams | Dirty or worn rollers, sensor issues | Hard | Inspect rollers and settings; consider service |
Once you have a rough idea of the jam type, you can follow the detailed steps below and focus on the areas that most likely contain the stuck paper.
Before You Start: Safety Checks for Clearing a Jammed Printer
Before touching anything inside the printer, slow down and set things up safely. A rushed pull on a stuck sheet can tear the paper or even damage rollers and sensors.
Most printers have moving parts, hot areas, and delicate plastic pieces. Treat the printer like any careful repair project: power down, work in good light, and use gentle force only.
Spending one minute on prep can save you from broken parts, pinched fingers, or a worse jam later.
Basic safety steps before opening your printer
Simple safety steps protect both you and the printer hardware. Follow these checks each time you clear a jam, even if you are in a hurry.
- Turn the printer off and unplug the power cable.
- Let hot parts cool, especially on laser printers near the fuser.
- Work in a bright area so you can see small scraps of paper.
- Avoid sharp tools; use your hands or soft tweezers only.
- Keep drinks and liquids away from the printer while it is open.
These precautions take only a few seconds but lower the chance of shocks, burns, or broken plastic parts while you clear the jammed paper.
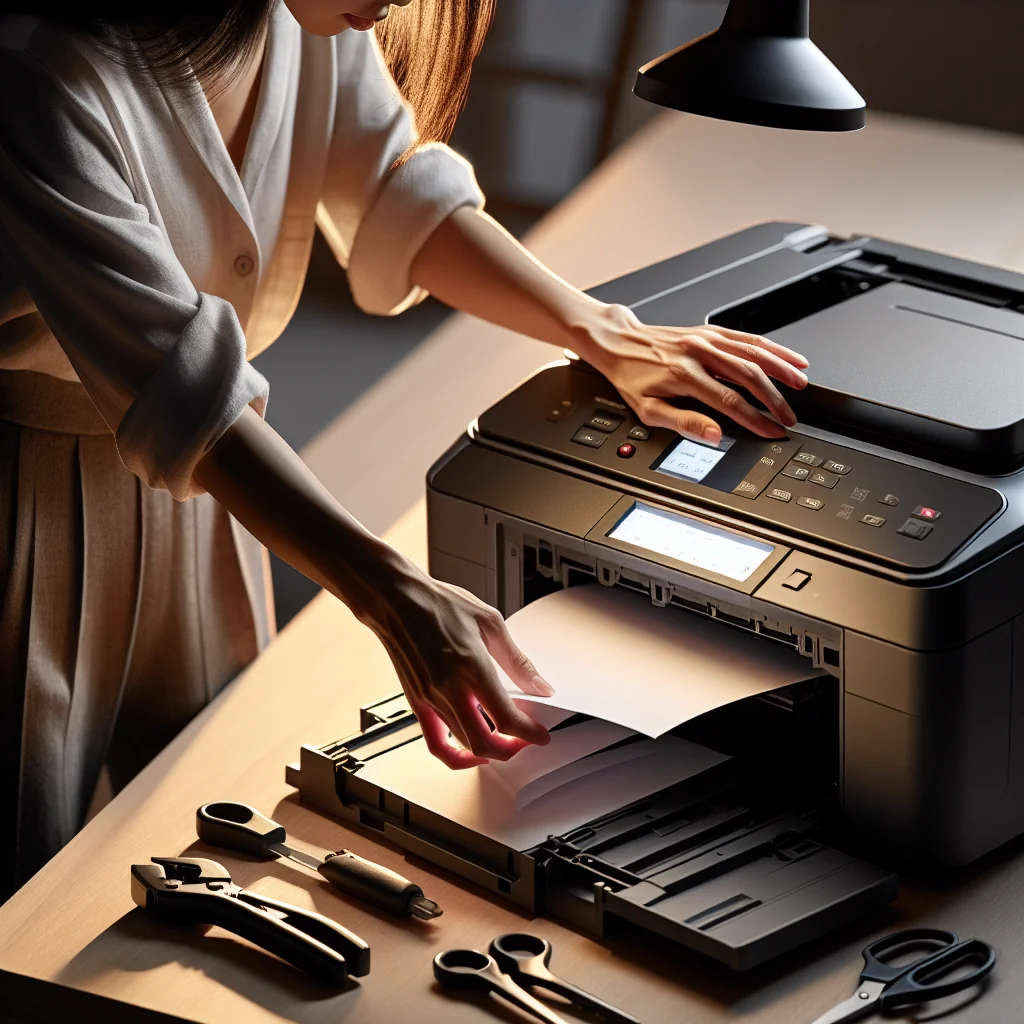
Step‑by‑Step: How to Resolve Printer Paper Jams Safely
Follow these steps in order. If your printer has a small display, watch for messages that show where the jam is located and match them with the areas you open.
-
Power off and unplug the printer
Turn the printer off using the power button, then unplug it from the wall. This stops motors from moving while your hands are inside and helps reset error messages later. -
Remove all loose paper from the trays
Take out the input paper stack and any printed pages in the output tray. Fan the stack and set it aside. Do not force paper that feels stuck; you will handle jams from inside the printer. -
Open the main access panels
Open the top cover or scanner lid on an inkjet printer, or the front and toner door on a laser printer. Look for clear signs of crumpled or skewed paper. Use a flashlight if needed. -
Gently pull paper in the normal feed direction
Grip the jammed sheet with both hands and pull slowly in the direction the paper normally travels. Avoid yanking or pulling backward, which can bend rollers or leave scraps behind. -
Check the rear access door or duplex unit
Many printers have a rear door or a duplex (two‑sided) module. Open or remove this part. Jams often hide here as folded or partially fed paper. Pull any sheets out carefully, again in the feed direction. -
Inspect the paper path for small scraps
Look along the entire paper path: under the rollers, near sensors, and around the fuser area. Remove small bits of torn paper with your fingers. Avoid using metal tools that can scratch or bend parts. -
Check the input tray guides and paper condition
Before reinserting paper, adjust the side guides so they just touch the stack without squeezing it. Remove curled, damp, or damaged sheets. Use clean, dry paper of the correct size and weight for your printer. -
Reassemble, plug in, and power on
Close all doors and panels firmly until they click. Reinsert the paper tray, plug the printer back in, and turn it on. Let the printer initialize and clear any error codes. -
Print a test page
Use the printer’s menu or your computer to print a simple test page. Listen for unusual grinding or squealing noises and watch how the paper feeds. If the test page prints cleanly, the jam is resolved.
If the printer still shows a jam error after these steps, there may be a hidden scrap of paper, a bent sensor arm, or worn rollers that need more attention and deeper checks.
Finding Hidden Jams: Tricky Spots People Often Miss
Sometimes the obvious jammed sheet is only part of the problem. Small pieces of paper can stick in tight corners and cause repeated errors or skewed prints even after you clear the main sheet.
Dust, adhesive from labels, and paper fibers also gather in corners. These can grab the leading edge of a page and create a fresh jam in the same place again and again.
Use the tips below to find sneaky jams that keep coming back and to clean the areas that often trap scraps.
Hidden jam hot spots inside most printers
Certain points along the paper path are more likely to snag paper. Knowing where these are helps you clear the full jam instead of missing a tiny piece that causes another problem later.
Under or around the pickup rollers:
These rubber rollers grab paper from the tray. Look for folded corners or thin strips wrapped around them.
Near the registration rollers:
This section lines up the sheet before printing. Slightly misfed paper here often looks wrinkled or off‑center.
Near the fuser area (often at the back in laser printers):
The fuser gets hot to bond toner. Paper can crumple as it passes through. Wait for the area to cool, then inspect gently.
After checking these areas, close the printer and try a single‑page print. If the printer still reports a jam, the problem may be mechanical, such as worn rollers, a broken gear, or a stuck sensor flag.
Why Printer Paper Jams Happen in the First Place
Understanding why jams occur makes them easier to prevent. Many causes are simple: wrong paper, poor storage, or misaligned guides are at the top of the list.
Some causes are related to the environment, such as high humidity or dust, while others come from user habits like overfilling the tray or mixing different paper types.
Once you know the likely reason for a jam, you can change how you load and store paper so jams become rare instead of routine.
Typical causes of paper jams you can control
Most paper jams come down to a few repeat issues that you can fix with small changes to your setup and routine.
Incorrect or poor‑quality paper:
Very thin, very thick, or damaged paper feeds poorly. So does damp or curled paper stored near humidity or heat.
Overfilled or misloaded tray:
Stacks that are too high or not seated properly can cause sheets to pull in at an angle.
Misaligned guides:
Guides set too wide let the stack skew. Guides set too tight squeeze and buckle the sheets.
Dirty or worn rollers:
Dust, ink, or paper fibers on rollers reduce grip. Old rollers harden and slip, pulling several sheets at once.
Foreign objects in the tray or path:
Staples, paper clips, or torn labels can catch and block paper movement.
By checking these areas after each jam, you build a habit of finding the real cause instead of just pulling out the stuck sheet and hoping for the best.
Preventing Future Jams: Simple Habits That Work
Preventing jams is much easier than clearing them. A few small habits can keep your printer running smoothly for years and reduce wasted time and paper.
Think of these habits as basic maintenance. Gentle, regular care keeps the paper path clean and reduces stress on rollers and gears.
Try to build the steps below into your regular printing routine so they become automatic.
Easy printer care tips to reduce jams
Use these simple habits to keep your printer’s paper path clear and reliable, even if you print large batches often.
Store paper properly:
Keep paper flat in its wrapper until use. Avoid damp rooms and direct sunlight. Discard warped or damaged sheets.
Fan and align the stack:
Before loading, fan the paper to separate sheets, tap the stack on a flat surface, then load it snugly into the tray.
Set the guides every time:
Adjust side and end guides to just touch the paper. Do not leave them wide “just in case.”
Use the right paper for the job:
For heavy media like labels or cardstock, choose the correct tray and settings in the print dialog.
Clean rollers periodically:
Use a soft, lint‑free cloth slightly dampened with water to wipe accessible rollers. Rotate them gently with your fingers as you clean.
Avoid reusing damaged prints:
Do not put wrinkled, previously jammed, or torn sheets back into the tray.
These habits take only a few seconds, but they cut down on jams, misfeeds, and crooked prints, and they help your printer last longer with less trouble.
When the Jam Keeps Coming Back: Deeper Troubleshooting
If you have cleared all visible paper and followed the steps above, yet the printer still jams, the issue may be deeper. At this point you are doing more advanced repair work.
Some recurring jams are caused by parts that have worn out or shifted over time. Others are due to settings that do not match the loaded paper or to sensors that no longer move freely.
Use the checks in the next section before giving up on the printer or assuming that you must replace it right away.
Advanced checks for persistent paper jams
These checks help you decide if the printer is worth fixing at home or needs a professional technician or replacement parts.
Check paper settings in software:
Make sure the selected size and type in the print dialog match the paper in the tray. Mismatched settings can send paper through the wrong path.
Inspect rollers for wear:
If rollers look shiny, cracked, or very hard, they may not grip paper correctly. Replacement kits exist for many models.
Look for bent sensor arms:
Small plastic flags detect paper as it moves. If one is stuck or bent, the printer may think paper is jammed when the path is clear.
Listen for grinding or clicking:
Odd noises can point to broken gears or misaligned parts that need expert repair.
If you are comfortable replacing parts, you may be able to swap rollers or simple sensor arms yourself on some printer models. Otherwise, compare the cost of parts and labor with a new device before you invest more time and money.
Building Your Repair Skills Beyond Printer Jams
Learning how to resolve printer paper jams is a great entry point into basic repair skills. The same patient, step‑by‑step mindset applies to many other fixes around your home and office.
The key habits are the same: power down first, inspect carefully, work methodically, and test after each change instead of guessing and rushing. This approach reduces mistakes and helps you understand how your devices work.
With practice, tasks that once felt frustrating—like a stubborn printer jam—become quick, routine jobs you can handle with confidence, saving time, money, and stress every time the printer complains.